There are many resources online to give you tips to achieve better lip syncing, the best way to get the best results is to simply research yourself. The videoes below will help you gain some quick tips, but there are no shortcuts to mastering lip syncing beyond practice.
https://www.youtube.com/watch?v=Gfw5BJi0RFw
https://www.youtube.com/watch?v=tMWiYIVoDis
--- Taking video of talking can allow you to perfectly mimic the mouth, similarly to rotoscoping.
1. Take video or either dialouge your characters say or to simply, common words.
2. Screen shot the moments of pronunciation of a word.
Use these as reference. A mirror handy at the studio can also help with on the fly animation drawing.
Have a code of mouth sounds to refer back to is also handy.
- Lip Syncing Tutorials
- Round class check in
- Studio Time
Tuesday, March 28, 2017
Wednesday, March 22, 2017
The Long Road Home
Congratulations, class! If you've been keeping up with class, you have all now successfully made your first "animatics". One could make an argument that this is the hardest part. One can go the distance, slaving away at an animation, but if the animatic isn't strong, if it's confusing, if specific movements and storytelling ques aren't addressed, it can be all for nothing.
We've reached the fun part. Actual animating! Drawing lots and lots and lots and lots of little pictures.
There is a little over a month left of school and we will be working in groups of 3 or 4 to finish 1 of the animatic.
1) Final showing of animatics. 8 - 8:20
2) Vote for best animatics
3) make groups based upon animatics
4) demonstration about animation philosophy; speed vs. accuracy and how much you can get away with in terms of inconsistency.
5) . Discuss within your group who will do what.
6) Lip Sync exercise: Videotape dialogue from the chosen animatic. Do drawings of a sentence to practice.
Sunday, March 5, 2017
Adapting your storyboard to sounds; Return emphasis to background & Hitchcock Rule
Mission Hill Animatic Episode -
https://www.youtube.com/watch?v=6T1t87wbnKQ
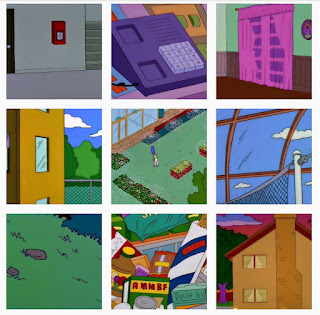
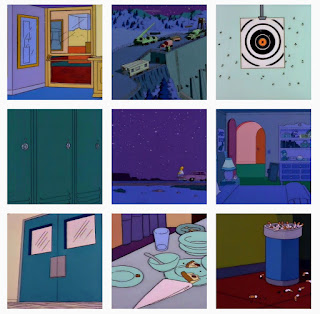
As we discussed earlier, having your 30 second animatics have internal logic is vital for grasping the attention of your audience. It is an element that can transcend an animation to the realm of an experience, as it gives off the effect of witnessing a separate reality. Consistency to the worlds created, specific details and even visual tangents are what separates derivative work from original work. It gives you, the creators, a never ending well of resources and paths to go down.
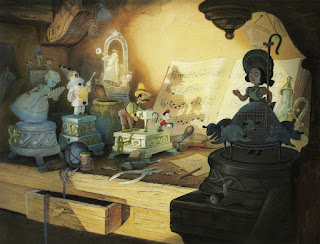
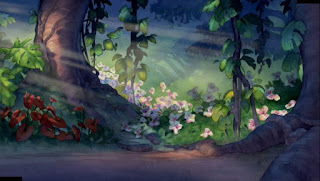
If you're beating yourself over the head as to where a story must go, perhaps 30 seconds of animatic has passed by simply pausing and observing the worlds you have created. Establishing shots, often more rendered and painterly, is a trope within narration that is highly anticipated and beloved by fans of animation art collectors.
As a result, we will be talking about background painting today.


Suggested scale: relative to 1080 x 1920 - 6.4 inches by 3.6 inches
Hitchcock Rule: "The Size of Any Object in Your Frame Should Be Proportional To Its Importance to the story at that moment".
https://www.youtube.com/watch?v=jCf1a7ApKhQ
More References:
http://nofilmschool.com/2015/11/hitchcock-rule-help-you-tell-better-visual-stories
http://gurneyjourney.blogspot.com/2013/08/hitchcocks-rule.html
https://www.youtube.com/watch?v=6T1t87wbnKQ
As we discussed earlier, having your 30 second animatics have internal logic is vital for grasping the attention of your audience. It is an element that can transcend an animation to the realm of an experience, as it gives off the effect of witnessing a separate reality. Consistency to the worlds created, specific details and even visual tangents are what separates derivative work from original work. It gives you, the creators, a never ending well of resources and paths to go down.
If you're beating yourself over the head as to where a story must go, perhaps 30 seconds of animatic has passed by simply pausing and observing the worlds you have created. Establishing shots, often more rendered and painterly, is a trope within narration that is highly anticipated and beloved by fans of animation art collectors.
As a result, we will be talking about background painting today.


Suggested scale: relative to 1080 x 1920 - 6.4 inches by 3.6 inches
Hitchcock Rule: "The Size of Any Object in Your Frame Should Be Proportional To Its Importance to the story at that moment".
https://www.youtube.com/watch?v=jCf1a7ApKhQ
More References:
http://nofilmschool.com/2015/11/hitchcock-rule-help-you-tell-better-visual-stories
http://gurneyjourney.blogspot.com/2013/08/hitchcocks-rule.html
Sunday, February 26, 2017
Sound; an Introduction
8:00- 8:30 - Lecture on Sound + Performance
Sound is critical to the success of an animatic. Witness a cartoon without it and with it, including the soundtrack and the contrast is startling. As we have seen in class, sound is the main inspiration of a variety of classics, most notably Fantasia. Let's look at some other examples of sound in class that exemplify animation.
Bruce Bickford w/ Frank Zappa
Mall 84:
https://vimeo.com/184245517
4 Track Demonstration:
Ultimately you want to have your various sounds on different "tracks" so that you may edit them individually. I do this the old fashion way, with a Tascam 4 track. This is where my mixing and editing occurs. If you can't find one of these dinosaurs, I suggest using the Lesley Sound Studio that is available to you to record conversation at the same time.
When playing music, traditionally drums, bass, guitar and vocals would be on 4 separate tracks. However, thanks to auxiliary cables, the source of music can be from just about anywhere and run through the same analog effects.

Once I have a mix I like, I put it the sounds back into the computer and edit it in AUDACITY, a free video recording and editing software.
http://www.audacityteam.org/
Here, sound can be chopped up, looped, distorted, amplified, slowed down, sped up, etc.
Once I have my soundtrack completely in order, I trace the time of the sound and co-ordinate it with VISUALS. The converging of these two things will be what makes the final animatic.
Roger Otto: Dinosaur Skateboarder was made this way, as well as a series of ongoing live performances.
8:30 - 8:45 - Looking at Color
Color!

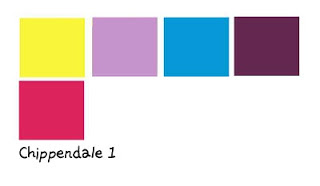
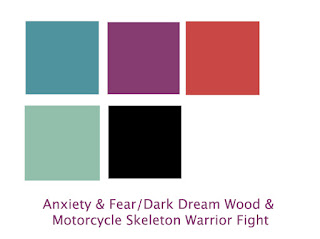

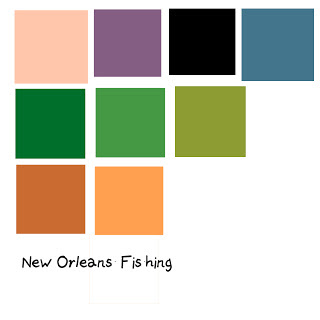
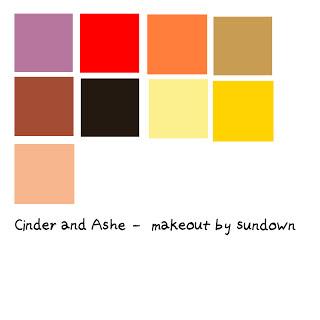
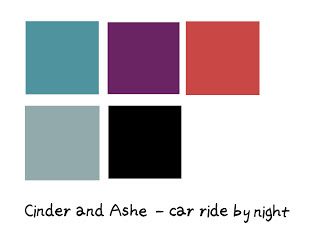
How does your color decisions reinforce the theme of your animatic? Does it play into the world you have built? Does it accompany the song? It is true to its adaptation?
9:00 - 10:00 - Critique of Homework
10 - 10:30 - Description of homework and experimentation with 4 track.
Homework: Write script and/or First take recordings. Attempt to mix sound using Audacity. Record with your phone. I suggest each piece of dialogue be its own file so that it can be pieced together in an audio program.
Sound is critical to the success of an animatic. Witness a cartoon without it and with it, including the soundtrack and the contrast is startling. As we have seen in class, sound is the main inspiration of a variety of classics, most notably Fantasia. Let's look at some other examples of sound in class that exemplify animation.
Bruce Bickford w/ Frank Zappa
Mall 84:
https://vimeo.com/184245517
4 Track Demonstration:
Ultimately you want to have your various sounds on different "tracks" so that you may edit them individually. I do this the old fashion way, with a Tascam 4 track. This is where my mixing and editing occurs. If you can't find one of these dinosaurs, I suggest using the Lesley Sound Studio that is available to you to record conversation at the same time.
When playing music, traditionally drums, bass, guitar and vocals would be on 4 separate tracks. However, thanks to auxiliary cables, the source of music can be from just about anywhere and run through the same analog effects.

Once I have a mix I like, I put it the sounds back into the computer and edit it in AUDACITY, a free video recording and editing software.
http://www.audacityteam.org/
Here, sound can be chopped up, looped, distorted, amplified, slowed down, sped up, etc.
Once I have my soundtrack completely in order, I trace the time of the sound and co-ordinate it with VISUALS. The converging of these two things will be what makes the final animatic.
Roger Otto: Dinosaur Skateboarder was made this way, as well as a series of ongoing live performances.
8:30 - 8:45 - Looking at Color
Color!


How does your color decisions reinforce the theme of your animatic? Does it play into the world you have built? Does it accompany the song? It is true to its adaptation?
9:00 - 10:00 - Critique of Homework
10 - 10:30 - Description of homework and experimentation with 4 track.
Homework: Write script and/or First take recordings. Attempt to mix sound using Audacity. Record with your phone. I suggest each piece of dialogue be its own file so that it can be pieced together in an audio program.
Tuesday, February 14, 2017
Santoro's Notecard Method

Notecard Method!
This Assignment is adapted from Frank Santoro, an aesthetic thinker in the field of comic books (he is a graphic novelist himself and often contributes articles to the comics journal). He has developed "the Notecard Method" which opens you up to being inspired to develop storyboards from your direct sketchbook. This means you could potentially develop a storyboard from just an image. Maybe you did a sketch, there are made up characters that you have not given names to, but you just love the composition! You just love the color you used. or maybe you just drew something on the subway; someone who was across from you who just looked interesting.
With the notecard method, you can start a storyboard at the END of a story, the BEGINNING of the story, or the MIDDLE of the story.
Homework: With your notecards, develop a storyboard. Try to use various sketchbook entires. What connects the drawings in your sketchbook? What power is there in gaining ideas from you subconscious or indirectly?
Sunday, February 5, 2017
It is not just what is being told, but how the story is being told.
Today is a BIG CRIT day!
8-8:45 - Character rotation crits. After crits, students can choose to except a final grade on the rotations or can have an extension to turn in a final character rotation on Wednesday. We will troubleshoot any last process, technology or craft issues presented in the character rotation gifs.
8:45 - 9 = break
9 = 10:15
ADAPTATION STORYBOARDS
Does the aesthetic of the storyboard fit well with the adapted script? Are the camera angles used appropriate for the story?
We will look over our storyboarded adaptations. Students will present their storyboards and walk us through them as if we were in an animation boardroom. We will cross reference their animations while looking at a variety of camera angles to ask if other camera angles would better fit the frames presented in storyboard panel.
Pan = A movement which scans a scene horizontally ... you may want to add "pan" notes to your storyboard". Panning is something that cannot be mimicked in graphic novels and is exclusive to the medium of film.
Framing, or Shot Length =
1. Extreme Long Shot - often used to show establishing shots. Normally an exterior, often the outside of a building or a landscape.
2. Long shot = Hard to categorize. Usually shots characters at "life" size, or full figure. Also called a FULL SHOT. A focus on characters but with plenty of background.
3. Medium Shot =
Contains a figure from the knees/waist up and is normally used for dialouge scenes or to show some detail of action.
4. Close-up: Pretty self explanatory.
5. Extreme Close up: Pretty self explanatory.
Camera Angles:
1. Bird's Eye View
2. High Angle
3. Eye Level
4. Low Angle
5. Oblique/Canted Angle
Camera Movements
1. Pans
2. Tilts
3. Dolly Shots
4. Hand-Held Shots
5. Crane Shots (Dolly shots in the air)
6. Zoom Lenses
7. Aerial Shot (Like a Crane but with a drone/helicopter)
A lot of this terminology does not apply because as animator your "camera" can literally go anywhere and do anything. You are not restricted by reality. However, having this vocabulary down will help you talk with filmmakers.
While on the topic of vocabulary, this is a good time to talk about lighting.
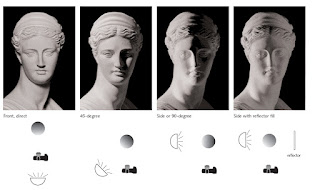
How a shot is lit will dramatically change the vibe of the shot. Here is a chart of lighting terms for reference.
Lastly, I am posting "Wally Wood's 22 panels that always work" again. While this is originally intended for cartoonists, and the terminology is specific to them, visually it can be a great guide for deciding what camera angles are appropriate when.

A nice youtube series on Wally's work.
https://www.youtube.com/watch?v=o_KwzCarm_0
10:15 - 10:30
Homework:
Quick in Class Demonstration of how to use Bosca Ceoil
1. Go to http://boscaceoil.net/ - I would suggest downloading the program, but there is an online version.
2. Construct a song. Play with the program, don't worry about making a musical masterpiece.
3. Save your project and have it ready to present in class on Wednesday for a class project.
Wednesday, February 1, 2017

Sunday, January 29, 2017
How to make a Character Rotation .GIF in photoshop
Hello students, welcome to class 3 of freshman animation seminar. Today we will -
8 - 9:30 : crit our characters! Ask questions about these characters. Asks follow up questions! Be curious! Remember! This process isn't a game of "gotcha!" - with the intensions of exposing you of not fleshing out our characters. No! This is an exercise in flexing the inquisitive mind. We want to get to the bottom of who these people are, what this environment is ... we want to develop a fully fleshed out world so that our animations have internal logic, specific details, elements that will make them more individual and far removed from a cookie cutter replica of a pre-established environment that is handicapped by the trappings of industry, genre or commodity culture. This is art school! Let's experiment!
9:30 - 9:45 : Break
9:45 - 10:15 :
Demo: HOW TO MAKE AN ANIMATED GIF IN PHOTOSHOP
1. Open up a new document at 1920x1080 pixels. Get in the habit of knowing these dimensions as they are used for youtube, a forum you will be using often as an animator.
Here we have your homework, completed and opened up in photoshop. A minimum of five heads, drawn with a computer mouse the night before class. Hey, points for getting it in on time, and not too bad with the proportions!
2. Make sure that each face is on a separate LAYER. Your LAYERS window can be opened by clicking WINDOW at the top of your photoshop controls and hitting LAYERS.
3. There are multiple ways of putting each different frame into a separate layer. I suggest scanning all five images in at once, hitting M for marquee tool, and cutting and pasting (shift C+ shift P) on top of one another. Once each drawing is copied and pasted onto a separate layer, delete the original underdrawing.

4. Open up timeline in photoshop by clicking window in the top controls. Click "Create Video TImeline".
5. In the bottom right hand corner of the timeline function, there is an icon of 3 squares. Click it. This shifts how the timeline is visualized. For audio, you would switch back to the other timeline. I have always been more comfortable with the three square method, feel free to use either one and experiment.

6.

Congratulations! You're half way there. Your timeline should look like this. The bottom time of the frame indicates how long of a pause should remain on that frame. The picture shows what the frame looks like. These are interchangeable. Click on the tab right next to the trashcan to make new frames.
7. From here, align you frames with your layer. Hit the eyeball on the side of the layer window to make them visible and invisible.
Your end product should look like this:

10:15 - 10:30:
Q & A plus description of the homework
Homework: Complete an animated GIF. for NEXT MONDAY. Wednesday there will be a seminar and workshop as well as additional homework assignments. Please bring drawing materials to the next class.
8 - 9:30 : crit our characters! Ask questions about these characters. Asks follow up questions! Be curious! Remember! This process isn't a game of "gotcha!" - with the intensions of exposing you of not fleshing out our characters. No! This is an exercise in flexing the inquisitive mind. We want to get to the bottom of who these people are, what this environment is ... we want to develop a fully fleshed out world so that our animations have internal logic, specific details, elements that will make them more individual and far removed from a cookie cutter replica of a pre-established environment that is handicapped by the trappings of industry, genre or commodity culture. This is art school! Let's experiment!
9:30 - 9:45 : Break
9:45 - 10:15 :
Demo: HOW TO MAKE AN ANIMATED GIF IN PHOTOSHOP
1. Open up a new document at 1920x1080 pixels. Get in the habit of knowing these dimensions as they are used for youtube, a forum you will be using often as an animator.

Here we have your homework, completed and opened up in photoshop. A minimum of five heads, drawn with a computer mouse the night before class. Hey, points for getting it in on time, and not too bad with the proportions!
2. Make sure that each face is on a separate LAYER. Your LAYERS window can be opened by clicking WINDOW at the top of your photoshop controls and hitting LAYERS.
3. There are multiple ways of putting each different frame into a separate layer. I suggest scanning all five images in at once, hitting M for marquee tool, and cutting and pasting (shift C+ shift P) on top of one another. Once each drawing is copied and pasted onto a separate layer, delete the original underdrawing.

4. Open up timeline in photoshop by clicking window in the top controls. Click "Create Video TImeline".
5. In the bottom right hand corner of the timeline function, there is an icon of 3 squares. Click it. This shifts how the timeline is visualized. For audio, you would switch back to the other timeline. I have always been more comfortable with the three square method, feel free to use either one and experiment.

6.

Congratulations! You're half way there. Your timeline should look like this. The bottom time of the frame indicates how long of a pause should remain on that frame. The picture shows what the frame looks like. These are interchangeable. Click on the tab right next to the trashcan to make new frames.
7. From here, align you frames with your layer. Hit the eyeball on the side of the layer window to make them visible and invisible.
Your end product should look like this:

10:15 - 10:30:
Q & A plus description of the homework
Homework: Complete an animated GIF. for NEXT MONDAY. Wednesday there will be a seminar and workshop as well as additional homework assignments. Please bring drawing materials to the next class.
Tuesday, January 24, 2017
Designing a Character; In-House Style Vs. Personal Aesthetic
Class Schedule:
1. 8 - 8:30; evaluating the Alan Moore Reading.
Questions:
Opening Question -
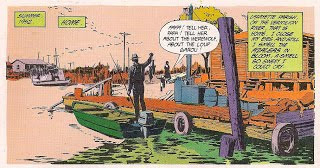
What is an odd thing that alligators eat in Louisiana?
8:30 - 8:45
Lecture on Well Developed Environments with Eternal Logic:
Springfield, The Simpsons

Due to the Simpson's prolonged length in programing, the show has consistently developed an entire environment, most notably examined in the classic episode "22 Short Stories About Springfield." The town of Springfield has developed an internal map that is observed in the opening credits in the form of a fly-by.
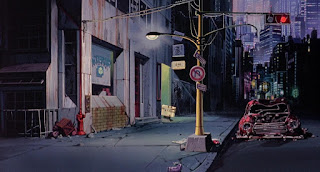
Neo-Tokyo, Akira

Neo-Tokyo in the landmark Anime classic, AKIRA, is a major part to the success of the film. The city itself is a character due to its attention to detail and vibe. The intricate elements of the environment heighten its illusion of reality, allowing the audience to feel the illusion of existing in a futuristic vision.
American Flagg!

Howard Chaykin's American Flagg! is cited in Alan Moore's "writing for comics" as an example of a narrative with a highly developed internal logic. The names of basketball teams within the future are mentioned, the recipes of the meals the characters eat are in the author's notes and the whole comic is interrupted by News Reports and Non Sequitur Commercials that exist within this Reagan Economics Futuristic Satire. Reading Flagg! now feels almost grotesque in its prophetic estimates of a corporately owned, oligarchical, hyper-masculinized and misogynistic society.
8:45 - 9:45: "In-House" Exercise & Crit"
Many animations and cartoons are drawn in an "In-House" style. This means a style which is predetermined by a head creator. The classic example of this would be "the Simpsons".


While the Simpsons have been "refined" in aesthetic (you will notice this early 1989 rendition of the family feels more hand drawn with no location of where light is hitting the characters in relation to the above image (making the below image appear flatter)), their proportions and characteristics are identical. While the cloning of a character can be done with the assistance of a computer, it is literally impossible for two humans to draw the exact same Homer Simpsons. The minute details of our individual hands cannot create exact copies. Our own artistic tendencies and how we hold our instruments of mark making are too idiosyncratic.
In contrast, DC and Marvel Comics have corporate owned characters that are NOT drawn in-house style. Their hand picked artists are encouraged to draw these characters in their own personal styles, although it is within the confines of the companies editors and owners. As a result, their characters can become marketable to a variety of audiences. A perfect example of this would be Batman and his depiction through the ages.

Batman is drawn for children in the pages of "Lil' Gotham".

And Batman is drawn for adults who are fans of gritty, noir crime literature.

Batman can be campy.

Batman can be slick and stylish.
Every artist interprets Batman to their own aesthetic vision that is developed into what is considered their iconic style.
Exercise:
Think of an In-House character. Popeye, Yogi Bear, the cast of Akira, the Simpsons, Family Guy are all good examples. We will collect a handful for the projector and then attempt to draw these in-house characters as perfectly as possible by observation.
When these In-House drawings are completed, draw the same character in your own personal aesthetic with your own materials. We will compare and contrast the two.
10 minute break
9:55 - 10:30:
Develop a Character for your environment. Develop questions for this character first. Write an entire page of questions like Alan Moore writes an entire column asking questions about the imaginary Neptune colony. If you get stuck, ask follow up questions to the answer to your questions. Once a page is written, post it in the comments section of this blog post. Once you have done this, enjoy the pleasure of illustrating your character. Consider the medium of animation when developing your character and that you will be most likely drawing lots and lots and lots and lots of little pictures of said character. Therefore, you may wish to keep the rendering and excessive details down. Consider how you can express your character with:
* Fashion Decisions
* Posture
* Facial Expression

When drawing your character, use the above handout as a model. Draw your character from the front, a "turn right" (3/4th view), profile right, back right, back. If your character is not symmetrical, draw the additional figures so that the character makes a full 360 rotation. This will prepare us for our first in-class animation, a character rotation GIF. Here are some examples drawn by Middle Schoolers.


I strongly believe in developing characters and environments before script writing. You can't write a script or draw storyboards based on characters and worlds you don't understand.
Next week we will go over -
1. 8 - 8:30; evaluating the Alan Moore Reading.
Questions:
Opening Question -
What is an odd thing that alligators eat in Louisiana?
8:30 - 8:45
Lecture on Well Developed Environments with Eternal Logic:
Springfield, The Simpsons

Due to the Simpson's prolonged length in programing, the show has consistently developed an entire environment, most notably examined in the classic episode "22 Short Stories About Springfield." The town of Springfield has developed an internal map that is observed in the opening credits in the form of a fly-by.
Neo-Tokyo, Akira

Neo-Tokyo in the landmark Anime classic, AKIRA, is a major part to the success of the film. The city itself is a character due to its attention to detail and vibe. The intricate elements of the environment heighten its illusion of reality, allowing the audience to feel the illusion of existing in a futuristic vision.
American Flagg!

Howard Chaykin's American Flagg! is cited in Alan Moore's "writing for comics" as an example of a narrative with a highly developed internal logic. The names of basketball teams within the future are mentioned, the recipes of the meals the characters eat are in the author's notes and the whole comic is interrupted by News Reports and Non Sequitur Commercials that exist within this Reagan Economics Futuristic Satire. Reading Flagg! now feels almost grotesque in its prophetic estimates of a corporately owned, oligarchical, hyper-masculinized and misogynistic society.
8:45 - 9:45: "In-House" Exercise & Crit"
Many animations and cartoons are drawn in an "In-House" style. This means a style which is predetermined by a head creator. The classic example of this would be "the Simpsons".


While the Simpsons have been "refined" in aesthetic (you will notice this early 1989 rendition of the family feels more hand drawn with no location of where light is hitting the characters in relation to the above image (making the below image appear flatter)), their proportions and characteristics are identical. While the cloning of a character can be done with the assistance of a computer, it is literally impossible for two humans to draw the exact same Homer Simpsons. The minute details of our individual hands cannot create exact copies. Our own artistic tendencies and how we hold our instruments of mark making are too idiosyncratic.
In contrast, DC and Marvel Comics have corporate owned characters that are NOT drawn in-house style. Their hand picked artists are encouraged to draw these characters in their own personal styles, although it is within the confines of the companies editors and owners. As a result, their characters can become marketable to a variety of audiences. A perfect example of this would be Batman and his depiction through the ages.

Batman is drawn for children in the pages of "Lil' Gotham".

And Batman is drawn for adults who are fans of gritty, noir crime literature.

Batman can be campy.

Batman can be slick and stylish.
Every artist interprets Batman to their own aesthetic vision that is developed into what is considered their iconic style.
Exercise:
Think of an In-House character. Popeye, Yogi Bear, the cast of Akira, the Simpsons, Family Guy are all good examples. We will collect a handful for the projector and then attempt to draw these in-house characters as perfectly as possible by observation.
When these In-House drawings are completed, draw the same character in your own personal aesthetic with your own materials. We will compare and contrast the two.
10 minute break
9:55 - 10:30:
Develop a Character for your environment. Develop questions for this character first. Write an entire page of questions like Alan Moore writes an entire column asking questions about the imaginary Neptune colony. If you get stuck, ask follow up questions to the answer to your questions. Once a page is written, post it in the comments section of this blog post. Once you have done this, enjoy the pleasure of illustrating your character. Consider the medium of animation when developing your character and that you will be most likely drawing lots and lots and lots and lots of little pictures of said character. Therefore, you may wish to keep the rendering and excessive details down. Consider how you can express your character with:
* Fashion Decisions
* Posture
* Facial Expression

When drawing your character, use the above handout as a model. Draw your character from the front, a "turn right" (3/4th view), profile right, back right, back. If your character is not symmetrical, draw the additional figures so that the character makes a full 360 rotation. This will prepare us for our first in-class animation, a character rotation GIF. Here are some examples drawn by Middle Schoolers.


I strongly believe in developing characters and environments before script writing. You can't write a script or draw storyboards based on characters and worlds you don't understand.
Next week we will go over -
Master Requirements
Cinematic grammar
Aspect ratio VS. resolution
Long shots, medium shots and full shots
Sunday, January 22, 2017
Syllabus!
IANIM-1300-02
Animation
Foundation Seminar 1
Instructor
Information
Jack Turnbull
(508) 783 3120
mr.jackwhturnbull@gmail.com
www.jackturnbull.com
Description
This course
focuses on the creation of a short animated film. Students bring their
ideas; they will cover the twelve principles of animation, as well as
filmmaking, conceptual thinking, story boarding, story structures, animatics,
character design, and lip-syncing. Each week, you will work toward
finishing your animated film, presenting a complete piece with sound at the end
of the semester.
Outcomes and
Goals:
- Students will learn the 12 principles of animation, universal laws of animation that they will continue to use throughout their professional careers
- Students will expand their abilities at conceptual thinking through a series of creative challenges dealing with mood, tension, humor, and drama
- Students will learn the components of story structure, how to construct the narrative elements that make up a film
- Students will discover how to tell a visual narrative through storyboarding, sequential images that describe the events of an animated sequence. It is a crucial planning tool for animation production
- Students will learn how to build an animatic, which consists of their storyboard edited in motion with sound
- Students will explore the way individuals appearance influence an audiences perception of them by learning the principles of character design
- Students will learn to work in group projects as well as individual creations
- Students will present their work for regular critiques, including a mid-term and final comprehensive critique
- Students will learn to work collaboratively as well as direct their own animation
Content:
In this class
students will direct their own 20-second animation while working as a team on
animations directed by other students. Using a round robin approach
students will experience every aspect of working on an animation team from
being the director, animator, to tweener.
Attendance
Policy
Regular
attendance in all classes required. Students are expected to arrive on
time and remain in class for the entire period scheduled. The
responsibility for work missed due to any type of absence rests with the
student. A failing grade will be assigned to any students who attends
less than 80% of class meetings (3 classes of a course meeting once a week or 6
classes of a course meeting twice weekly). Any exceptions are made at the
discretion of the instructor.
Expectations
Students are
expected to develop a professional attitude in all aspects of this
course. This includes not only fulfilling course requirements, but also
demonstrating respect for your self, instructor, classmates, and workspace at
all times.
- Please do not use the computers during lecture or discussion time.
- Emailing, Facebook, IM-ing, etc. is not permitted during class time. It is distracting and disrespectful to your instructor and other students.
- Cell phones should not be used during class time. Please leave phones outside of classroom
- Food or drink should not be near the computers or digital equipment at any time.
- Please do not leave any trash in the room.
SHARED
COMPUTER HABITS:
At the end of
each class make sure you have:
- Closed all applications
- Saved, transported, emailed, and or trashed your own work on classroom lab computers
- Cleaned up around your space
As a member of
the class, the level of your work, commitment, and participation are valuable
and essential to the development of creativity, knowledge, and skills of each
individual. Your active role enhances the overall learning experience of
the class, so please be sure to contribute. During class critiques,
activities, and discussions, you are expected to participate in a respectful,
constructive manner. Any disruptive behavior would be a violation of
course decorum and may be penalized.
RESPONSIBILITY
OF THE STUDENT:
To pass this
course the student:
- Must be on time and prepared at the start of every class
- Have good attendance
- Turn in projects on time
- Participate in class discussions and critiques
- Complete all course projects and exercises
- Complete all course related readings, research, and writing assignments
- Submit a high quality final Digital Portfolio
Grading Policy
Class
Participation 28%
Homework 60%
Final
presentation 6%
Sketch Book 6%
Late work will
not be accepted, but all work that is handed in on time can be redone at any
time during the semester for a better grade. Work is expected at the
start of class.
A Laptop and
external hard drive are required for every class. Lack of either at the
start of class will result in an absence for the class period.
- Missing Portfolio pieces will be subtracted from the appropriate category.
- A missing portfolio at the end of the semester will result in failure of the class.
- Students must treat one another with respect. Any art or behavior that is deliberately offensive will be penalized.
- One hour of outside work is the required minimum for each credit hour of class. Expect to do at least three hours of outside work per week. For higher marks expect to do at least twice that amount of work outside of class.
Evaluation for
Projects and Assignments will be based on your: Process, Progress, Clarity of
Concept, Technical Execution, Craftsmanship, and Presentation as well as
participation in class critiques, discussions and activities, attention to
quality of work, effort, overall progress, meeting deadlines, attendance and
open-mindedness throughout the course.
Itinerary/Schedule:
This syllabus
is only a guideline for the course I may make changes to it as the course
progresses.
Module I Pre
production (5wks):
- Storytelling
- 3 Act story
- The Hero’s journey
- Script writing
- Creating storyboards
- Cinematic language
- Round robin projects
- Editing
- Color studies
- Character sheets
Project #1 – 3
Act story: Create a 3act story using Mad libs.
Project #2 –
Storyboard someone else’s story
Project #3 –
Ink a storyboard
Project #4 –
create edits, montage and use Hitchcock’s rule to enhance a story
Project #5 –
color studies and character development with turn around
Module II
Production (10 wks)
- Foley
- Lip syncing
- Principles of animation
- File management
- File sharing
- Lighting
- Gesture drawing
- Team work
- Animatic
- Line of action
- Character expressions
- Animation
- Scratch disc
- Sound track
- Dialogue
- Set dressing
- Background scenes
- Editing
Project #6 –
create extremes for sequence
Project
#7 - tweens for animation
Project #8 –
scene dressing and background scenes
Project #9 –
Scratch disc
Project
#10 - lip syncing
Project #11 –
Animatic
Project #12 –
Animation
Calendar
Week 1 Monday January 23
CW: Introduction
Instructor
Introduction
Roger
Otto: The Animation
Roger Otto:
The Comic Book (Re-aloud)
Alan Moore
Story Structure & the major significance of the Introduction (or the
environment and theme)
Alan Moore
argues that the most significant part of any story is the idea of the story, or
what the story is ABOUT beyond the plot (which is related to what the story is
about but is its own thing). For example, No Country For Old Men is a
horror-western about a psychotic maniac chasing after a stolen sachet of money,
but what the story is ABOUT is confronting the existence of evil, a meditation
on the randomness of death and an intension to de-romanticize violence. Watchmen
is a superhero whodunnit, but what the story is about is an exploration of the
question “what if super heroes were real?”.
However, when
creating an animation, you don’t have to start with the idea. Starting
with an idea can seem extremely daunting; I might as well ask “what is your art
about?” which is a question artists struggle with their whole careers because
what our art is about is usually in flux. So sometimes a good catalyst to
flesh out an idea is to first create an environment and characters.
Before you can
make an animation or write a script, the environment and characters must be
established. You can’t write the dialogue for a character you don’t know
because a character will speak and act a specific way depending upon their
motivations, characteristics and environment.
You can’t even
write a character until you’ve established an environment. We can all
agree that we would be very different people if we were living in Syria right
now. Our environment drastically shifts our character.
Take Class
Outside and draw on location environment shots.
Imagine your
landscape drawings are now existing in an alternative reality. This
alternative reality can be as abstract or as mundane as you wish. It can
very not too different from our own world or it can be drastically
different. It can exist in a different time period or on another
planet. The only consistent is the structure of the landscape; you are
using reality as a “skeleton” so to speak. Answer the following questions
before you start the second drawing:
What is
the population of the environment?
* Does
this environment have any local sports teams?
* How
are those sports teams? Do they win or lose?
* If you
environment is on another planet, what is the gravity like?
* Is
there any rodent or pest problems in this environment?
* What
is the employment rate?
* What
does this environment sound like?
* What
is the leading cause of death in this environment?
* What
is the birth rate?
* How
are people’s nutrition? Are they getting enough vitamins? Is food sparse
or plentiful?
* What
is the local government like, if there is a local government?
* Are
there ethnic or communal tensions within this community?
Homework:
Come in Wednesday with a sketch of this alternative reality Porter Square with
the questions answered.
Master
Requirements
Storytelling
review
The 3 act
story
Different
genres
Script writing
Introduction
Project #1 Create a 3 act story in class
Wednesday
January 25
CW:
Now that we
have a fleshed out environment, we will spend this class time developing 1
character. It is important to develop the environment first because the
environment influences a character. If your environment is a dingy, dank,
dark cave, it will affect the character within it as opposed to if the
environment is a wide-open field in spring.
Write 20
questions about this character. It is extra helpful if the questions relate
to the environment you just established. Once these 20 questions are
answered, you can begin to draw this character.
Draw this
character in 3 different camera angles. Observe Wally Wood’s 22 Panels
that always work for reference. Go over Long shots, Medium Shots and Full
Shots. Go over Screen Resolution and paper ratio to youtube video (which
will be our final “canvas”). Write twenty
Master
Requirements
Cinematic
grammar
Aspect ratio
VS. resolution
Long shots,
medium shots and full shots
HW: Make a
character rotation GIF of your character within the character’s
environment.
Week 2 Monday, 30 January
CW:
Crit of
character rotations.
In-House style
Vs. personal aesthetic. It is not just
what your character wears, but how the
character is drawn.
Wednesday
February 1
CW:
Pre-production
idea #2:
Adaptation
Watch:
Inherent Vice & Read Inherent Vice. Compare and contrast the two
Watch: No
Country For Old Men & Read No Country for Old Men. Compare and
Contrast the two.
Dramatic shots
and camera angles
Establishing
shots and emblematic shots
Introduction
Project #2A Storyboard a story that is not your own following the script:
storyboard may be hand done, digital or collaged
Shots and
camera angles continued
Compositions
2/3rds 1/3rd
rules
Shots with
drama: high angles, low angles, and canted angles
HW: Create a storyboard of an adapted
story. This can be in the form of a news
report, a fable, a historical event, etc.
It should be something recognizable to the general public (please no obscurities,
doing so will give the audience little reference and ultimately be pointless
for educational purposes).
Adding in and
subtracting notecards is vital to this process.
When critique is over, we will start talking about how to adapt a story
in one medium to another. Using The
given storyboard create active compositions for all scenes that are Long shots,
emblematic shots, establishing shots, medium shots and full shots, high angles,
low angles, and canted angles. Draw with active compositions.
Week 3:
Monday,
February 6
Start class by critiquing adaptation storyboards. Does the aesthetic of
the storyboard fit well with the adapted script?
CW: Synesthesia and inter sensory experiences;
the internal process of transcribing music to visuals.
Watch: Fantasia. Discuss: Heinz
Werner.
Storyboarding
Meet with
Director of story for feedback
Cinematic
grammar
Camera
actions: zoom, trucking, dolly
Line of action
Racking focus
Depth of field
Introduction
Project #2B Add symbols for camera actions and shots as well as timing to story
and storyboard
Wednesday,
February 8
CW: Introduce: Computer sequencers;
how to score music for an animation.
Students will create 30 second songs.
Students will then draw inspiration from these songs through drawing while
listening to music.
Beats
Pacing
Scenes and
sequences
Timing
Storytelling
through value
HW: Write a song for class for next week using a
computer sequencer.
Week
4 Monday, February 13
CW: Students will
present their songs. As we listen to
each song, each student will draw what they see in their imagination while
listening to the song. We will discuss the parallels of the music to the images
and see if there are potential story ideas that development from this
experience.
Edits and cuts
and transitions
Montage
Hitchcock’s
rule
Workshop with
Director and make notes and edits
Wednesday,
February 15
CW: Workshop
day. Students will bring in the three
storyboards they have been developing; the Alan Moore world building method,
the synesthesia method and the adaptation.
From these three the students will discuss which ones are
strongest. We will focus the rest of the
semester on developing this particular storyboard into a 30 second
animatic.
Lecture on
COLOR.
180• rule
Cutting on
action
Storytelling
through color
HW: TBA
Week 5 Monday,
February 20th
President’s
Day
Wednesday,
February 22nd
CW: Meet with
Directors to get notes on storyboards
Character
Development
Character
turn-arounds
Color studies
HW:
Project #5B Using a director’s color study, color in the corresponding
storyboard. Create a character turn around sheets for both the
protagonist and the antagonist.
Week 6 Monday,
February 27th
CW: Directors
critique storyboards and character sheets
Create
animation schedule
Animatics
Critique
stories: ship, shelve or shred – (production teams will be made for the top
third of the stories)
Extreme Poses
in-betweens and tweens
Directors
choose the medium of animation
Animation
teams chosen
File sharing
and file format
Wednesday,
March 1
CW: Creating Foley
Editing sound
in Premiere
Directors -
Create dialogue for a scene in your animation
HW: Project #6A
Directors create the extreme poses for your sequence, and create animation
schedule for their team
Week 7 Monday,
March 6
CW: lip syncing
Directors meet
up with animators to workshop animation
Tweening
Critique
12 Principles
of animation
Creating Foley
Wednesday,
March 8
CW: workshop
story
Editing sound
in Premiere
Project #9
Team creates a scratch disc
HW: Project #7A
Tween 5-7 seconds of animation on any animation
Week 8 Monday,
March 13
Wednesday,
March 15
Spring Break
Week 9 Monday,
March 20
CW: Project # 11
create animatic
Daily’s:
Directors give a 1 minute review of where their team is and their animation
schedule
Polish
sound
Foley
12 Principles
of Animation
Wednesday,
March 22
CW: lay down the
sound for any dialogue
Background and
set dressing
HW: Director
#6B: Start organizing the animatic, draw in any break down poses
Animator #7B:
tween scenes
Art Director:
Project#8: Start creating scene dressing and back ground scenes
Week 10
Monday, March 27
CW:
Daily’s: Directors give a 1 minute review of their film
Project #10
Create lip syncing for a scene in your animatic
Wednesday, March
29
CW: Workshop
animations
HW: Team members
switch roles: Director becomes Animator, Animator – Art Director, Art Director
– Director
Director
#6B: Start organizing the animatic, draw in any break down poses
Animator #7B:
tween scenes
Art Director:
Project#8: Start creating scene dressing and back ground scenes
Week 11
Monday, April 3
CW:
Daily’s: Directors give a 1 minute review of their film
Build
animation with new job roles
Wednesday,
April 5
CW: Workshop
animations
Build
animation with new job roles
HW: Team members
switch roles: Director becomes Animator, Animator – Art Director, Art Director
– Director
Director
#6B: Start organizing the animatic, draw in any break down poses
Animator #7B:
tween scenes
Art Director:
Project#8: Start creating scene dressing and back ground scenes
Week 12
Monday, April 10
CW: Critique,
original Directors present their animations
Wednesday,
April 12
CW: Start
replacing scratch disc with sound track
Workshop
stories
HW: Team members
switch roles: Director becomes Animator, Animator – Art Director, Art Director
– Director
Director
#6B: Start organizing the animatic, draw in any break down poses
Animator #7B:
tween scenes
Art Director:
Project#8: Start creating scene dressing and back ground scenes
Week 13
Monday, April 17
CW:
Daily’s: Directors give a 1 minute review of where their team is and
their animation
Wednesday,
April 19
CW: Creating
special effects
Replace
animatic with animation
HW: Animate the
Extreme poses of a Sequence at least 10 seconds
Team members
switch roles: Director becomes Animator, Animator – Art Director, Art Director
– Director
Director
#6B: Start organizing the animatic, draw in any break down poses
Animator #7B:
tween scenes
Art Director:
Project#8: Start creating scene dressing and back ground scenes
Week 14
Monday, April 24
CW:
Daily’s: Directors give a 1 minute review of where their team is and
their animation
Refine
animation
Project #12
final animation
Wednesday,
April 26
CW: Editing animations.
Director’s to assign last minute jobs to their teams
HW: Team
members switch roles: Director becomes Animator, Animator – Art Director, Art
Director – Director
Director
#6B: Start organizing the animatic, draw in any break down poses
Animator #7B:
tween scenes
Art Director:
Project#8: Start creating scene dressing and back ground scenes
Week 15
Monday, May 1 Final class presentation
CW:
Critique: Original Director’s present films
Wednesday, May
3 Final class presentation
CW: Make edits to
films and hand them in
HW: Finalize
your film and have animatic ready for final presentation
Required Texts
and Materials
Atomic
Learning.com
External Hard
Drive with at least a terabyte of space
Computer with
the Adobe CC
Drawing paper
10” x 12” sketchbook
Drawing
utensils
Suggested
Texts and Materials
The Animators
Survival Kit, Richard Williams
Timing For
Animation, Harold Whitaker, John Halas
Story, Robert
McKee
Animation
Unleashed, Ellen Besen
The Animation
Bible, Maureen Furniss
The Animation
Book, Kit Laybourne
Research &
Critical Inquiry
The College of
Art and Design Library & Sherrill Library (main Lesley University library):
Students are encouraged to use library collections and services for both
academic research and studio art inspiration.
For General
Refernece help:
asklib@lesley.edu
For research
and Instructional needs:
Micki
Harrington, MLS
Art Research
and Instruction Librarian, Moriarty Library
Lesley
University Library
617.349.8071
mharri27@lesley.edu
Tamar Gonen
Brown, PHD
Assitant
Director of Research and Instruction
Lesley
University Library
617.349.8862
tbrown13@lesley.edu
For
Circulation, Reserves, and Interlibrary Loans:
Access
Services Supervisor, Moriarty Library
Assits with
circulation, reserves, and interlibrary loan
617.349.8070
moriartylibrary@lesley.edu
Circulation
Desk
617-349-8070
Art &
Design Research Guides
http://research.lesley.edu/art
- Books, exhibition catalogs and videos are listed in the FLO library catalog.
- Articles from journals, magazines, and entire e-books are online in the library databases (MyLesley login required).
- High quality museum images, including contemporary art, are online in the library databases and books.
- Interlibrary Loan service delivers items not available from Lesley or FLO.
Research
strategies, MLA citation help, library tutorials and personalized research help
by email, IM or phone.
Academic
Dishonesty
Academic
dishonesty comes in many forms. The following list is not meant to be
exhaustive and a student may be charged and found guilty of violating the
University’s Academic Integrity Policy for an offense not enumerated below.
Academic dishonesty includes: cheating, plagiarism, fabrication and
falsification, multiple submissions, abuse of academic materials,
complicity/unauthorized assistance, lying/tampering/theft. Please review the
student handbook for details: http://www.lesley.edu/academic-integrity-policy/
Disability
Statement
Lesley
University is committed to ensuring that all qualified students with
disabilities are afforded an equal opportunity to participate in and to benefit
from its programs and services. To receive accommodations, a student must have
a documented disability as defined by Section 504 of the Rehabilitation Act of
1973 and the ADA Amendments Act of 2008, and must provide documentation of the
disability. Eligibility for reasonable accommodations will be based on
the documentation provided.
If you are a
student with a documented disability, or feel that you may have a disability,
please contact the appropriate disability administrator:
Learning
Disabilities and Attention Disorders for On-Campus Students
Kimberly J.
Johnson, Director LD/ADD Academic Support Program
Doble Hall, 2nd
floor
Phone: 617.349.8462 • Fax: 617.349.8324
kjohnso7@lesley.edu
Physical, Sensory,
and Psychiatric Disorders for On-Campus Students
G. Ruth
Kukiela Bork, Director of Access Services for Students with Disabilities
11 Mellen
Street
Phone: 617.349.8194 • Fax: 617.349. 8558 • TTY: 617.349.8544
rbork@lesley.edu
For All
Off-Campus Students
Daniel Newman,
Lesley University ADA/504 Coordinator
Doble Hall, 2nd
Floor
Phone: 617.349.8572 • Fax: 617.349.8324
dnewman@lesley.edu
The contact
persons play the role of facilitator between
the student's
needs, faculty requirements, and administrative guidelines of the University.
Disability-related information is not shared without the permission of the
student.
Equal
Opportunity and Inclusion Policy
Lesley
University remains committed to a policy of equal opportunity, affirmative
action, and inclusion for all
current and
prospective faculty, students, and staff and
to eliminating
discrimination when it occurs. Lesley University does not discriminate on the
basis of race, color, religion, sex, national origin, age, veteran status,
disability, or sexual orientation in admission to, access to, treatment in, or
employment in its programs and activities. Lesley will not ignore any form of
discrimination, harassment, or sexual harassment by any member of the Lesley
community. Moreover, Lesley does not condone any form of retaliation against
any person who brings a complaint of discrimination, harassment or sexual
harassment or against anyone who cooperates in a complaint investigation.
Subscribe to:
Comments (Atom)