There are many resources online to give you tips to achieve better lip syncing, the best way to get the best results is to simply research yourself. The videoes below will help you gain some quick tips, but there are no shortcuts to mastering lip syncing beyond practice.
https://www.youtube.com/watch?v=Gfw5BJi0RFw
https://www.youtube.com/watch?v=tMWiYIVoDis
--- Taking video of talking can allow you to perfectly mimic the mouth, similarly to rotoscoping.
1. Take video or either dialouge your characters say or to simply, common words.
2. Screen shot the moments of pronunciation of a word.
Use these as reference. A mirror handy at the studio can also help with on the fly animation drawing.
Have a code of mouth sounds to refer back to is also handy.
- Lip Syncing Tutorials
- Round class check in
- Studio Time
Tuesday, March 28, 2017
Wednesday, March 22, 2017
The Long Road Home
Congratulations, class! If you've been keeping up with class, you have all now successfully made your first "animatics". One could make an argument that this is the hardest part. One can go the distance, slaving away at an animation, but if the animatic isn't strong, if it's confusing, if specific movements and storytelling ques aren't addressed, it can be all for nothing.
We've reached the fun part. Actual animating! Drawing lots and lots and lots and lots of little pictures.
There is a little over a month left of school and we will be working in groups of 3 or 4 to finish 1 of the animatic.
1) Final showing of animatics. 8 - 8:20
2) Vote for best animatics
3) make groups based upon animatics
4) demonstration about animation philosophy; speed vs. accuracy and how much you can get away with in terms of inconsistency.
5) . Discuss within your group who will do what.
6) Lip Sync exercise: Videotape dialogue from the chosen animatic. Do drawings of a sentence to practice.
Sunday, March 5, 2017
Adapting your storyboard to sounds; Return emphasis to background & Hitchcock Rule
Mission Hill Animatic Episode -
https://www.youtube.com/watch?v=6T1t87wbnKQ
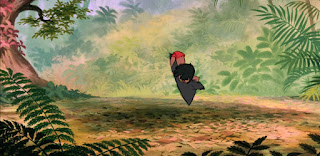
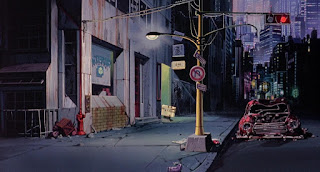
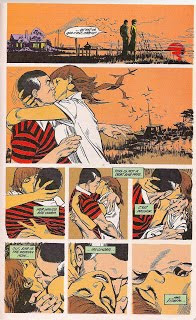
As we discussed earlier, having your 30 second animatics have internal logic is vital for grasping the attention of your audience. It is an element that can transcend an animation to the realm of an experience, as it gives off the effect of witnessing a separate reality. Consistency to the worlds created, specific details and even visual tangents are what separates derivative work from original work. It gives you, the creators, a never ending well of resources and paths to go down.
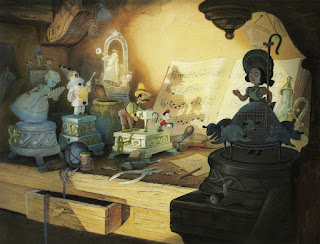
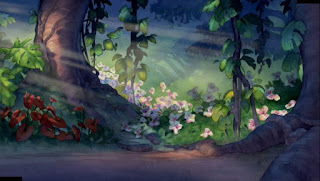
If you're beating yourself over the head as to where a story must go, perhaps 30 seconds of animatic has passed by simply pausing and observing the worlds you have created. Establishing shots, often more rendered and painterly, is a trope within narration that is highly anticipated and beloved by fans of animation art collectors.
As a result, we will be talking about background painting today.

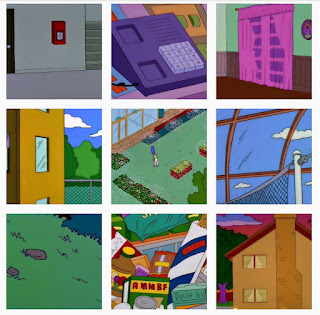
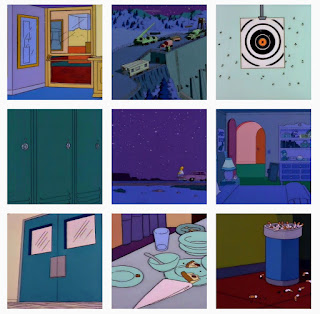
Suggested scale: relative to 1080 x 1920 - 6.4 inches by 3.6 inches
Hitchcock Rule: "The Size of Any Object in Your Frame Should Be Proportional To Its Importance to the story at that moment".
https://www.youtube.com/watch?v=jCf1a7ApKhQ
More References:
http://nofilmschool.com/2015/11/hitchcock-rule-help-you-tell-better-visual-stories
http://gurneyjourney.blogspot.com/2013/08/hitchcocks-rule.html
https://www.youtube.com/watch?v=6T1t87wbnKQ
As we discussed earlier, having your 30 second animatics have internal logic is vital for grasping the attention of your audience. It is an element that can transcend an animation to the realm of an experience, as it gives off the effect of witnessing a separate reality. Consistency to the worlds created, specific details and even visual tangents are what separates derivative work from original work. It gives you, the creators, a never ending well of resources and paths to go down.
If you're beating yourself over the head as to where a story must go, perhaps 30 seconds of animatic has passed by simply pausing and observing the worlds you have created. Establishing shots, often more rendered and painterly, is a trope within narration that is highly anticipated and beloved by fans of animation art collectors.
As a result, we will be talking about background painting today.


Suggested scale: relative to 1080 x 1920 - 6.4 inches by 3.6 inches
Hitchcock Rule: "The Size of Any Object in Your Frame Should Be Proportional To Its Importance to the story at that moment".
https://www.youtube.com/watch?v=jCf1a7ApKhQ
More References:
http://nofilmschool.com/2015/11/hitchcock-rule-help-you-tell-better-visual-stories
http://gurneyjourney.blogspot.com/2013/08/hitchcocks-rule.html
Sunday, February 26, 2017
Sound; an Introduction
8:00- 8:30 - Lecture on Sound + Performance
Sound is critical to the success of an animatic. Witness a cartoon without it and with it, including the soundtrack and the contrast is startling. As we have seen in class, sound is the main inspiration of a variety of classics, most notably Fantasia. Let's look at some other examples of sound in class that exemplify animation.
Bruce Bickford w/ Frank Zappa
Mall 84:
https://vimeo.com/184245517
4 Track Demonstration:
Ultimately you want to have your various sounds on different "tracks" so that you may edit them individually. I do this the old fashion way, with a Tascam 4 track. This is where my mixing and editing occurs. If you can't find one of these dinosaurs, I suggest using the Lesley Sound Studio that is available to you to record conversation at the same time.
When playing music, traditionally drums, bass, guitar and vocals would be on 4 separate tracks. However, thanks to auxiliary cables, the source of music can be from just about anywhere and run through the same analog effects.

Once I have a mix I like, I put it the sounds back into the computer and edit it in AUDACITY, a free video recording and editing software.
http://www.audacityteam.org/
Here, sound can be chopped up, looped, distorted, amplified, slowed down, sped up, etc.
Once I have my soundtrack completely in order, I trace the time of the sound and co-ordinate it with VISUALS. The converging of these two things will be what makes the final animatic.
Roger Otto: Dinosaur Skateboarder was made this way, as well as a series of ongoing live performances.
8:30 - 8:45 - Looking at Color
Color!

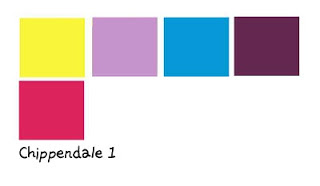
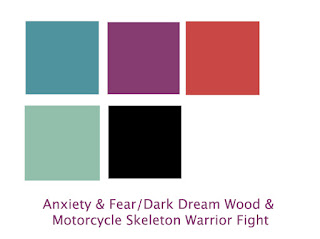

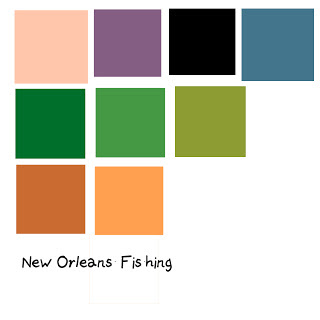
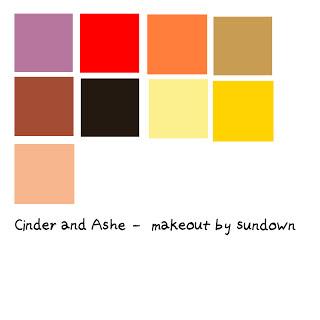
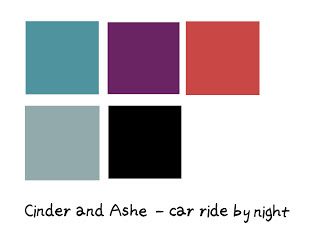
How does your color decisions reinforce the theme of your animatic? Does it play into the world you have built? Does it accompany the song? It is true to its adaptation?
9:00 - 10:00 - Critique of Homework
10 - 10:30 - Description of homework and experimentation with 4 track.
Homework: Write script and/or First take recordings. Attempt to mix sound using Audacity. Record with your phone. I suggest each piece of dialogue be its own file so that it can be pieced together in an audio program.
Sound is critical to the success of an animatic. Witness a cartoon without it and with it, including the soundtrack and the contrast is startling. As we have seen in class, sound is the main inspiration of a variety of classics, most notably Fantasia. Let's look at some other examples of sound in class that exemplify animation.
Bruce Bickford w/ Frank Zappa
Mall 84:
https://vimeo.com/184245517
4 Track Demonstration:
Ultimately you want to have your various sounds on different "tracks" so that you may edit them individually. I do this the old fashion way, with a Tascam 4 track. This is where my mixing and editing occurs. If you can't find one of these dinosaurs, I suggest using the Lesley Sound Studio that is available to you to record conversation at the same time.
When playing music, traditionally drums, bass, guitar and vocals would be on 4 separate tracks. However, thanks to auxiliary cables, the source of music can be from just about anywhere and run through the same analog effects.

Once I have a mix I like, I put it the sounds back into the computer and edit it in AUDACITY, a free video recording and editing software.
http://www.audacityteam.org/
Here, sound can be chopped up, looped, distorted, amplified, slowed down, sped up, etc.
Once I have my soundtrack completely in order, I trace the time of the sound and co-ordinate it with VISUALS. The converging of these two things will be what makes the final animatic.
Roger Otto: Dinosaur Skateboarder was made this way, as well as a series of ongoing live performances.
8:30 - 8:45 - Looking at Color
Color!


How does your color decisions reinforce the theme of your animatic? Does it play into the world you have built? Does it accompany the song? It is true to its adaptation?
9:00 - 10:00 - Critique of Homework
10 - 10:30 - Description of homework and experimentation with 4 track.
Homework: Write script and/or First take recordings. Attempt to mix sound using Audacity. Record with your phone. I suggest each piece of dialogue be its own file so that it can be pieced together in an audio program.
Tuesday, February 14, 2017
Santoro's Notecard Method

Notecard Method!
This Assignment is adapted from Frank Santoro, an aesthetic thinker in the field of comic books (he is a graphic novelist himself and often contributes articles to the comics journal). He has developed "the Notecard Method" which opens you up to being inspired to develop storyboards from your direct sketchbook. This means you could potentially develop a storyboard from just an image. Maybe you did a sketch, there are made up characters that you have not given names to, but you just love the composition! You just love the color you used. or maybe you just drew something on the subway; someone who was across from you who just looked interesting.
With the notecard method, you can start a storyboard at the END of a story, the BEGINNING of the story, or the MIDDLE of the story.
Homework: With your notecards, develop a storyboard. Try to use various sketchbook entires. What connects the drawings in your sketchbook? What power is there in gaining ideas from you subconscious or indirectly?
Sunday, February 5, 2017
It is not just what is being told, but how the story is being told.
Today is a BIG CRIT day!
8-8:45 - Character rotation crits. After crits, students can choose to except a final grade on the rotations or can have an extension to turn in a final character rotation on Wednesday. We will troubleshoot any last process, technology or craft issues presented in the character rotation gifs.
8:45 - 9 = break
9 = 10:15
ADAPTATION STORYBOARDS
Does the aesthetic of the storyboard fit well with the adapted script? Are the camera angles used appropriate for the story?
We will look over our storyboarded adaptations. Students will present their storyboards and walk us through them as if we were in an animation boardroom. We will cross reference their animations while looking at a variety of camera angles to ask if other camera angles would better fit the frames presented in storyboard panel.
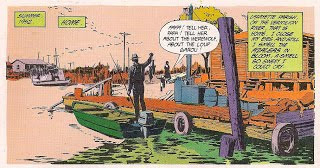
Pan = A movement which scans a scene horizontally ... you may want to add "pan" notes to your storyboard". Panning is something that cannot be mimicked in graphic novels and is exclusive to the medium of film.
Framing, or Shot Length =
1. Extreme Long Shot - often used to show establishing shots. Normally an exterior, often the outside of a building or a landscape.
2. Long shot = Hard to categorize. Usually shots characters at "life" size, or full figure. Also called a FULL SHOT. A focus on characters but with plenty of background.
3. Medium Shot =
Contains a figure from the knees/waist up and is normally used for dialouge scenes or to show some detail of action.
4. Close-up: Pretty self explanatory.
5. Extreme Close up: Pretty self explanatory.
Camera Angles:
1. Bird's Eye View
2. High Angle
3. Eye Level
4. Low Angle
5. Oblique/Canted Angle
Camera Movements
1. Pans
2. Tilts
3. Dolly Shots
4. Hand-Held Shots
5. Crane Shots (Dolly shots in the air)
6. Zoom Lenses
7. Aerial Shot (Like a Crane but with a drone/helicopter)
A lot of this terminology does not apply because as animator your "camera" can literally go anywhere and do anything. You are not restricted by reality. However, having this vocabulary down will help you talk with filmmakers.
While on the topic of vocabulary, this is a good time to talk about lighting.
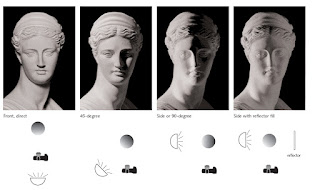
How a shot is lit will dramatically change the vibe of the shot. Here is a chart of lighting terms for reference.
Lastly, I am posting "Wally Wood's 22 panels that always work" again. While this is originally intended for cartoonists, and the terminology is specific to them, visually it can be a great guide for deciding what camera angles are appropriate when.

A nice youtube series on Wally's work.
https://www.youtube.com/watch?v=o_KwzCarm_0
10:15 - 10:30
Homework:
Quick in Class Demonstration of how to use Bosca Ceoil
1. Go to http://boscaceoil.net/ - I would suggest downloading the program, but there is an online version.
2. Construct a song. Play with the program, don't worry about making a musical masterpiece.
3. Save your project and have it ready to present in class on Wednesday for a class project.
8-8:45 - Character rotation crits. After crits, students can choose to except a final grade on the rotations or can have an extension to turn in a final character rotation on Wednesday. We will troubleshoot any last process, technology or craft issues presented in the character rotation gifs.
8:45 - 9 = break
9 = 10:15
ADAPTATION STORYBOARDS
Does the aesthetic of the storyboard fit well with the adapted script? Are the camera angles used appropriate for the story?
We will look over our storyboarded adaptations. Students will present their storyboards and walk us through them as if we were in an animation boardroom. We will cross reference their animations while looking at a variety of camera angles to ask if other camera angles would better fit the frames presented in storyboard panel.
Pan = A movement which scans a scene horizontally ... you may want to add "pan" notes to your storyboard". Panning is something that cannot be mimicked in graphic novels and is exclusive to the medium of film.
Framing, or Shot Length =
1. Extreme Long Shot - often used to show establishing shots. Normally an exterior, often the outside of a building or a landscape.
2. Long shot = Hard to categorize. Usually shots characters at "life" size, or full figure. Also called a FULL SHOT. A focus on characters but with plenty of background.
3. Medium Shot =
Contains a figure from the knees/waist up and is normally used for dialouge scenes or to show some detail of action.
4. Close-up: Pretty self explanatory.
5. Extreme Close up: Pretty self explanatory.
Camera Angles:
1. Bird's Eye View
2. High Angle
3. Eye Level
4. Low Angle
5. Oblique/Canted Angle
Camera Movements
1. Pans
2. Tilts
3. Dolly Shots
4. Hand-Held Shots
5. Crane Shots (Dolly shots in the air)
6. Zoom Lenses
7. Aerial Shot (Like a Crane but with a drone/helicopter)
A lot of this terminology does not apply because as animator your "camera" can literally go anywhere and do anything. You are not restricted by reality. However, having this vocabulary down will help you talk with filmmakers.
While on the topic of vocabulary, this is a good time to talk about lighting.

How a shot is lit will dramatically change the vibe of the shot. Here is a chart of lighting terms for reference.
Lastly, I am posting "Wally Wood's 22 panels that always work" again. While this is originally intended for cartoonists, and the terminology is specific to them, visually it can be a great guide for deciding what camera angles are appropriate when.

A nice youtube series on Wally's work.
https://www.youtube.com/watch?v=o_KwzCarm_0
10:15 - 10:30
Homework:
Quick in Class Demonstration of how to use Bosca Ceoil
1. Go to http://boscaceoil.net/ - I would suggest downloading the program, but there is an online version.
2. Construct a song. Play with the program, don't worry about making a musical masterpiece.
3. Save your project and have it ready to present in class on Wednesday for a class project.
Wednesday, February 1, 2017

Subscribe to:
Posts (Atom)